How to download & install RabbitMQ on Windows, enable the management GUI, and publish and consume messages using C#.
Download the latest Windows installer for RabbitMQ Server (this one is version 3.8.5) from GitHub:
https://github.com/rabbitmq/rabbitmq-server/releases/download/v3.8.5/rabbitmq-server-3.8.5.exe
Run rabbitmq-server-3.8.5.exe to install RabbitMQ as a Windows service.
Now you’ll want to enable to the RabbitMQ browser-based management GUI. To enable it, open CMD as Administrator and cd to “C:/Program Files/RabbitMQ Server/rabbitmq_server-3.8.5/sbin”
Run this command: rabbitmq-plugins enable rabbitmq_management
It may ask you to allow firewall permissions:

Open a browser and navigate to http://localhost:15672. Log in to the management interface using the default username and password: guest
You did it! The next section demonstrates publishing and consuming messages from a queue using C#.
Simple Code Example with .NET Core 3.x
Create a new .NET Core 3.x console app in Visual Studio.
Install the RabbitMQ.Client NuGet package:

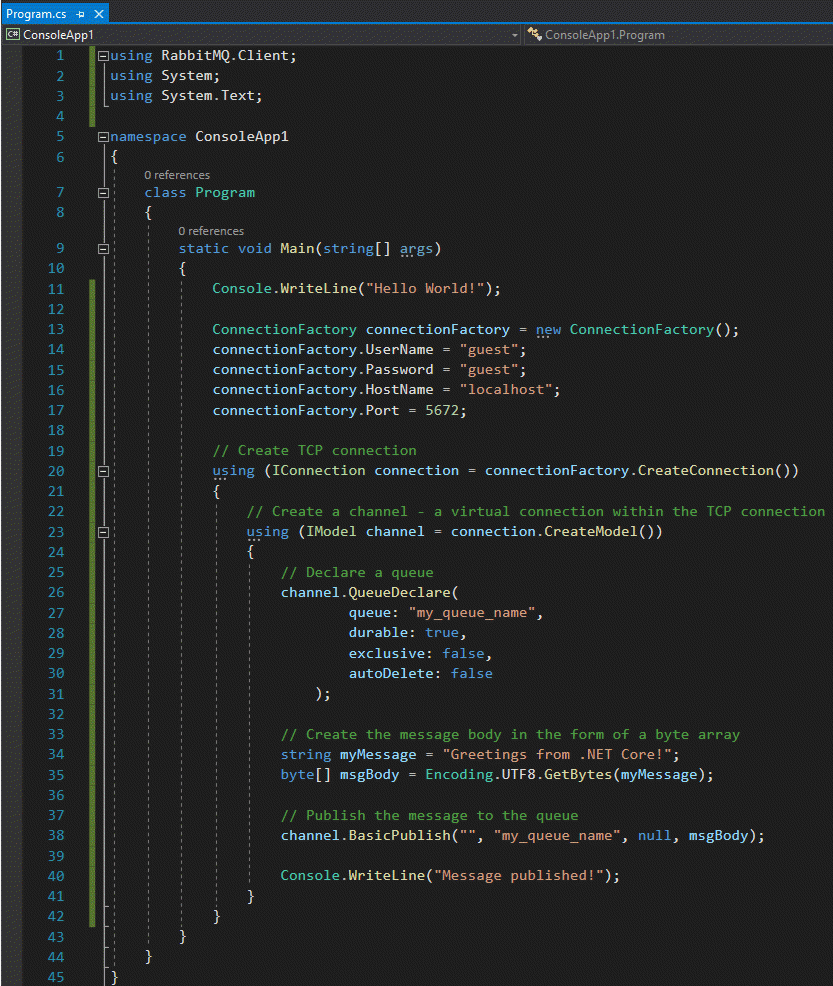
Write this code in Program.cs:

Now run the console app. If you look at the RabbitMQ management interface in your browser, you should see that there’s a message queued up:

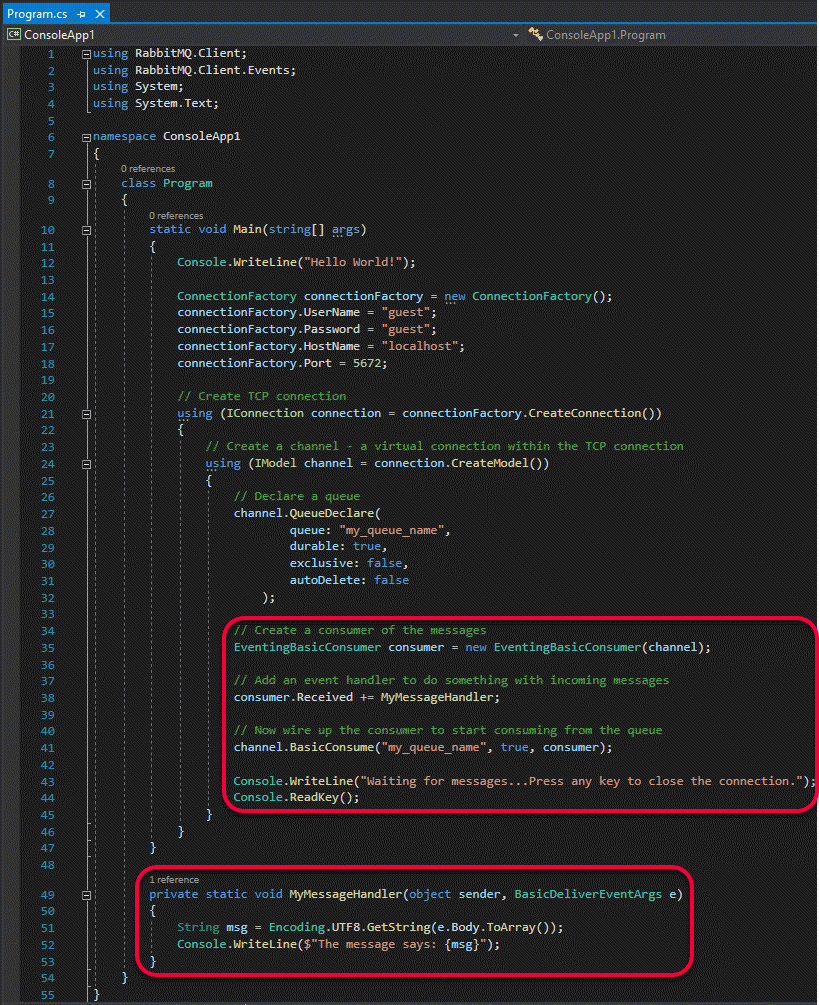
Stop the app from running. Now let’s try consuming the message in that queue. Modify your code like so:

Run the app, and it should print the following:

While it’s still connected, you can watch it consume more messages by manually publishing them from the management interface. To do this, navigate to the Queues tab and click on the queue named my_queue_name. Scroll down, and you’ll find a section of that page where you can type a message a publish it. When you publish it, it should immediately be consumed by your consumer and printed to the console window.
Leave a Reply